A PETG profile for the Ender-3 V3 KE that stops fighting the stock settings
The KE ships with a multiplier, a retraction distance and a bed temperature that all work for PLA and all work against PETG. This profile replaces five of them, built from measurements on this specific machine rather than from a generic PETG starting point.
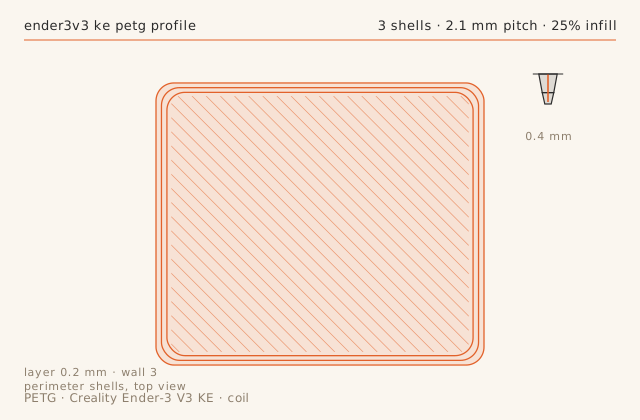
Slice diagramsDrawn from this entry’s own slicer settings.
Print record
- Machine
- Creality Ender-3 V3 KE
- Material
- PETG
- Nozzle
- 0.4 mm
- Layer height
- 0.2 mm
- Walls
- 3
- Infill
- 25%
- Print time
- 1 h 48 min
- Published
- August 31, 2026
The stock multiplier is the first thing to change
Creality's stock extrusion multiplier of 1.00 produced a 0.45 mm wall against a 0.42 mm target and grew a 40 mm block to 40.16 mm. Dropping to 0.95 gave a 0.41 mm wall and a 39.91 mm block. The KE's direct-drive Sprite extruder has a shorter effective melt path than a bowden setup, which means less of the excess pressure is absorbed by the tube — so the visible consequences of over-extrusion arrive sooner.
The tell is ridging where the top perimeter meets the top fill. If you see that, change the multiplier before anything else.
Retraction has to be longer here than on a modern direct drive
1.4 mm is the value that stopped stringing on this machine, against 0.8 mm on the MK4. The Sprite extruder's melt zone is longer and the nozzle sits further from the drive gears, so more filament has to be pulled back to break the tail. Below 1.2 mm the part had strings on every long travel; at 1.8 mm the nozzle clogged from material dragged into the cold zone.
The usable window is about 0.6 mm wide. Change it in 0.2 mm steps and print a stringing tower each time rather than guessing.
Bed temperature and sheet cleanliness are one problem
The first three prints detached mid-way. The cause was not the temperature setting but the sheet: wiping with IPA had been redistributing skin oils rather than removing them. Hot water, dish soap and a paper towel fixed it, and raising the bed from 75 to 80 C kept it fixed for ten prints. At 85 C the first layer squished out into elephant-footing, which needed a 0.4 mm chamfer to remove.
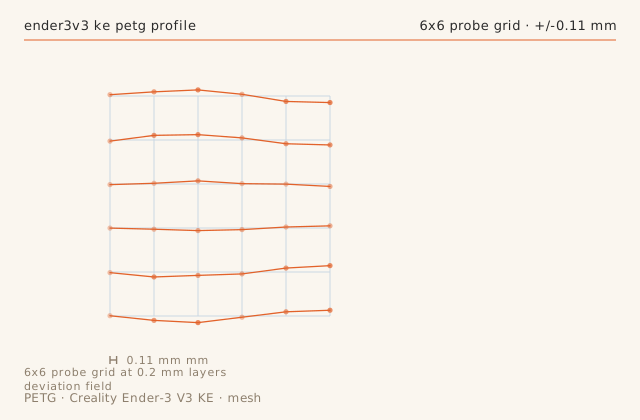
The KE's auto mesh also matters more than on a machine with a flatter bed: with 0.11 mm of peak-to-peak variation on the stock sheet, running a fresh 6x6 mesh before every PETG print is worth the 90 seconds.
Do not push the outer wall on this machine
The KE advertises high speeds and the motion system can reach them, but the bed is a bedslinger with a moving mass and at 90 mm/s of outer wall the parts showed corner ringing that input shaper did not fully remove. 60 mm/s produced clean corners at 108 minutes for a typical 40 mm part, against about 85 minutes at 90 mm/s.
Infill can run at 120 mm/s without any visible penalty. The 23 minutes you save by pushing the outer wall is not worth the surface you lose.
Failure chainWhat went wrong, what was done about it, and what came out the other side.
-
Step 01
Symptom
Parts detached from the textured PEI sheet mid-print on the first three attempts.
Fix
Washed the sheet with hot water and dish soap rather than IPA, then ran a fresh 6x6 bed mesh and raised the bed to 80 C.
Result
Ten consecutive prints with full adhesion. IPA alone had been spreading the skin oils around rather than removing them.
Dimensional check
- Feature
- 40 mm PETG calibration block
- Nominal
- 40 mm
- Measured
- 39.91 mm-0.09
- Tolerance
- ± 0.1 mm
- Note
- 0.95 multiplier keeps the block under 40 mm. The KE's stock multiplier of 1.00 grows PETG parts by about 0.4 percent at this size.
Parameter sweep
| Parameter | Tested | Chosen | Why |
|---|---|---|---|
| Extrusion multiplier | 0.92 / 0.94 / 0.95 / 1.00 | 0.95 | 0.95 gave a 0.41 mm wall and a 39.91 mm block; 1.00 gave a 0.45 mm wall, ridges and a 40.16 mm block. |
| Nozzle temperature | 225 / 230 / 235 / 242 C | 235 C | 225 C caused layer separation on a 3 mm wall; 242 C produced heavy stringing on the stock 1.4 mm retraction. |
| Retraction | 1.0 / 1.2 / 1.4 / 1.8 mm | 1.4 mm | The KE's Sprite extruder has a longer bowden-free path than the MK4. 1.0 and 1.2 left strings; 1.8 pulled molten material into the cold zone. |
| Bed temperature | 70 / 75 / 80 / 85 C | 80 C | At 70 C the first layer lifted at the corners of a 150 mm part; 85 C caused elephant-footing that needed a 0.4 mm chamfer. |
| Perimeter speed | 40 / 60 / 90 / 120 mm/s | 60 mm/s | The KE's bed is not rigid enough for high outer wall speeds; at 90 mm/s the part showed corner ringing that the input shaper could not fully remove. |
Slicer profile
# LayerLog PETG profile v2 — Creality Ender-3 V3 KE, stock 0.4 nozzle
# Creality OS (Klipper) — pressure advance via the printer.cfg, not the slicer
nozzle_temp: 235
nozzle_temp_first_layer: 238
bed_temp: 80
layer_height: 0.20
first_layer_height: 0.28
perimeters: 3
perimeter_speed: 60
infill_speed: 120
solid_infill_speed: 90
travel_speed: 250
accel: 3000
pressure_advance: 0.046
retraction: 1.4 mm at 30 mm/s, wipe on
max_volumetric_speed: 10 mm3/s
extrusion_multiplier: 0.95
seam_position: rear
z_hop: 0.4 mm
bed_mesh: 6x6 auto, run before every PETG print
What carried over
- Set the extrusion multiplier to 0.95 on the KE; the stock 1.00 grows PETG parts about 0.4 percent.
- Use 1.4 mm of retraction, against 0.8 mm on a MK4 — the Sprite melt path is longer.
- Wash the PEI sheet with hot water and dish soap; IPA alone spreads skin oils.
- Keep the outer wall at 60 mm/s on this bedslinger; only infill can run at 120 mm/s.
Verdict
This is the working PETG profile for the KE at 108 minutes for a 40 mm part. Run a fresh bed mesh before every print and keep the sheet clean.
Also on this machine Creality Ender-3 V3 KE
-
Print log
Z banding on the KE: an 8 mm period, then a 2 mm period, and two different fixes
Z banding has a period, and the period tells you the cause before you touch anything. This log works through two bands on the same machine — one at the leadscrew rotation period and one at the thread pitch — and shows why the first needed a mechanical fix and the second needed a software one.
- MaterialPLA
- Nozzle0.4 mm
- Layer height0.2 mm
- Print time58 min
- Failure chain2
-
Tune profile
TPU 95A on the KE's stock extruder: 3 hours 44 minutes and one very specific buckling point
The KE's Sprite extruder is direct drive, which makes flexible filament possible rather than easy. This profile is built around a 3.0 mm3/s ceiling that the machine will actually sustain, and it documents the one place where every failed attempt fails.
- MaterialTPU-95A
- Nozzle0.4 mm
- Layer height0.24 mm
- Print time3 h 44 min
- Failure chain2
-
Print log
Shimming the KE's bed: 0.15 mm of mesh error that compensation could not hide
Auto-levelling has a limit, and on a 0.28 mm first layer that limit is about 0.08 mm. This log covers a KE with a 0.15 mm low corner, the shim washers that fixed it mechanically, and the nine-position first-layer test that proves it worked.
- MaterialPLA
- Nozzle0.4 mm
- Layer height0.28 mm
- Print time41 min
- Failure chain2