Shimming the KE's bed: 0.15 mm of mesh error that compensation could not hide
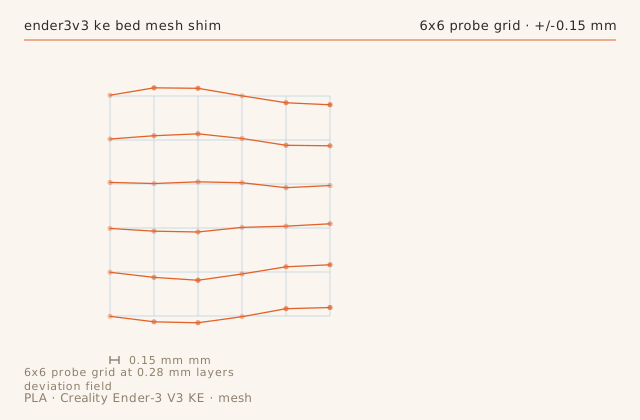
Auto-levelling has a limit, and on a 0.28 mm first layer that limit is about 0.08 mm. This log covers a KE with a 0.15 mm low corner, the shim washers that fixed it mechanically, and the nine-position first-layer test that proves it worked.
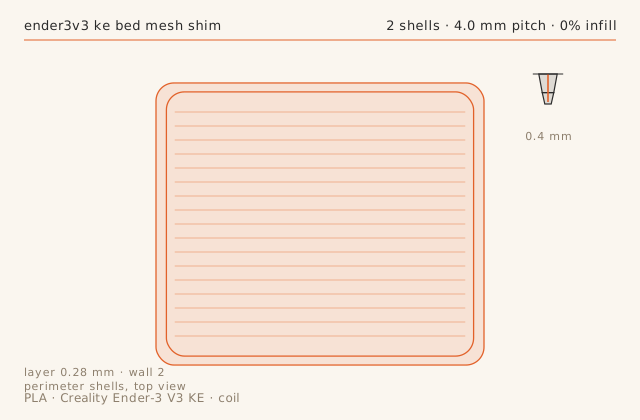
Slice diagramsDrawn from this entry’s own slicer settings.
Print record
- Machine
- Creality Ender-3 V3 KE
- Material
- PLA
- Nozzle
- 0.4 mm
- Layer height
- 0.28 mm
- Walls
- 2
- Infill
- 0%
- Print time
- 41 min
- Published
- September 21, 2026
Find the real limit of mesh compensation
Mesh compensation moves the nozzle up and down to follow the bed, and every millimetre of correction costs you a small amount of Z accuracy and a visible change in the first layer's thickness. On this machine, compensation stopped being useful past about 0.08 mm of deviation: beyond that the low area was translucent and the high area had ridges.
The honest way to find your machine's limit is a nine-position single-layer test: print nine 20 mm single-layer squares at known mesh coordinates and measure each with a caliper. If the range is wider than about 25 percent of your first layer height, the mesh is being asked to do too much and the fix is mechanical.
Shim washers are the correct mechanical fix
The KE's bed carriage has fixed standoffs, so correcting a low corner means adding material between the bed and the carriage. A 0.12 mm shim washer under the front-left corner brought that area up, and the measurement range across nine positions fell from 0.15 mm to 0.03 mm. A washer is preferable to a printed spacer because it does not creep under the bed's heat.
Always re-run the mesh twice after a shim change. If the two meshes do not agree, the shim is not seated and you are measuring a loose bed rather than a corrected one.
Fixing one corner moves the problem
Once the front-left was corrected, the rear-right became the low point at 0.05 mm — which is what should happen, because the total deviation is a property of the sheet and the carriage, not of one corner. A second 0.05 mm shim brought it in. Two iterations is normal; if you are on your fifth shim, the carriage or the sheet is bent and no amount of shimming will fix it.
Keep the washers you took out and label them. When the sheet is replaced you will want to start from the original stack rather than from the corrected one.
Why this matters more on a 0.28 mm first layer
The first layer on this print is 0.28 mm. A 0.15 mm deviation is more than half the layer height, which means the low area is barely touching the bed and the high area is being pressed into it. On a 0.20 mm first layer the same deviation would be unprintable in places.
Print a thick first layer for parts that do not need a fine bottom surface, and fix the bed mechanically for parts that do. Trying to solve a mechanical problem with a slicer setting always ends in the same place, just later.
Failure chainWhat went wrong, what was done about it, and what came out the other side.
-
Step 01
Symptom
The mesh showed a 0.15 mm low spot at the front-left that auto-levelling could not correct, and the first layer there was translucent.
Fix
Compensation was already at its limit. Added a 0.12 mm shim washer under the front-left corner between the bed and the carriage, re-ran the mesh, and re-set the Z offset.
Result
Range across nine measured positions went from 0.15 mm to 0.03 mm. The low corner no longer needs compensation.
-
Step 02
Symptom
After adding the shim, the rear-right corner became the low point at 0.05 mm.
Fix
Added a 0.05 mm shim on that corner as well, then re-ran the mesh twice to confirm the result was repeatable.
Result
Nine positions within 0.03 mm of each other. Both meshes agreed, so the change is mechanical and stable.
Dimensional check
- Feature
- first-layer thickness at nine bed positions
- Nominal
- 0.28 mm
- Measured
- 0.26 mm-0.02
- Tolerance
- ± 0.04 mm
- Note
- Range across nine positions went from 0.19-0.34 mm to 0.25-0.28 mm after a 0.12 mm shim under the front-left corner of the bed carriage.
Slicer profile
printer_model: Creality Ender-3 V3 KE 0.4
layer_height: 0.28
perimeters: 2
infill: 0, single-layer squares
perimeter_speed: 45
accel: 2000
nozzle_temp: 210
bed_temp: 60
part_cooling: 0% for layer one
pressure_advance: 0.040
bed_mesh: 6x6, saved
first_layer_height: 0.28
What carried over
- Mesh compensation stops being useful past about 0.08 mm of deviation on a 0.28 mm first layer.
- A nine-position single-layer test is the only honest measure of what the mesh is doing.
- Shim washers, not printed spacers — printed material creeps under bed heat.
- Run the mesh twice after a shim change; disagreement means the shim is not seated.
Verdict
Bed deviation is now 0.03 mm across nine measured positions, and the mesh is no longer being asked to work at its limit.
Also on this machine Creality Ender-3 V3 KE
-
Print log
Z banding on the KE: an 8 mm period, then a 2 mm period, and two different fixes
Z banding has a period, and the period tells you the cause before you touch anything. This log works through two bands on the same machine — one at the leadscrew rotation period and one at the thread pitch — and shows why the first needed a mechanical fix and the second needed a software one.
- MaterialPLA
- Nozzle0.4 mm
- Layer height0.2 mm
- Print time58 min
- Failure chain2
-
Tune profile
TPU 95A on the KE's stock extruder: 3 hours 44 minutes and one very specific buckling point
The KE's Sprite extruder is direct drive, which makes flexible filament possible rather than easy. This profile is built around a 3.0 mm3/s ceiling that the machine will actually sustain, and it documents the one place where every failed attempt fails.
- MaterialTPU-95A
- Nozzle0.4 mm
- Layer height0.24 mm
- Print time3 h 44 min
- Failure chain2
-
Print log
Stringing on the KE: temperature first, retraction second, and the trade you make to get it
Stringing is the most over-diagnosed problem in FDM printing, and the diagnosis is almost always the same order: temperature, then travel, then retraction. This log takes a tower from heavy unbroken threads to fine wisps on the KE, and explains the surface cost of getting there.
- MaterialPLA
- Nozzle0.4 mm
- Layer height0.2 mm
- Print time1 h 16 min
- Failure chain2